![fourvenues.LOGO.blanco.png]](https://base-conocimientos.fourvenues.com/hs-fs/hubfs/fourvenues.LOGO.blanco.png?height=40&name=fourvenues.LOGO.blanco.png)
Before you start
ℹ️ Who can do this:
Only users with Admin or Event Management permissions can create rates.
Step by step
-
Go to Settings > Zones.
This is where you manage all rates and zones for your events.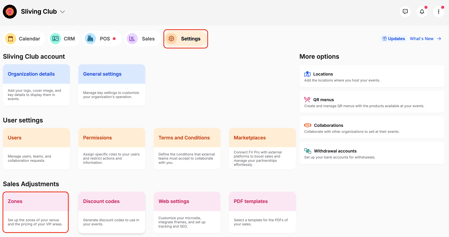
-
Click Create rate.
The configuration menu will open. -
Set up the main information of the rate:
-
Name
-
Internal description (optional): not shown to customers.
-
Price: cost of the rate.
-
Max people: number of people included.
-
Max extra people: if you want to allow extras, set how many and at what price each. ⚠️ Keep in mind: the maximum number of guests set in the rate should match the maximum capacity of the space. You can check the Zones article to see how to configure spaces properly.
-
Includes and Conditions: e.g. minimum spend, non-refundable, etc.
-
-
Configure additional options:
-
💳 Deposit: define how much the customer must pay upfront when booking.
-
🧾 Management fees: set the service fees the customer will pay.
-
💰 Allow full online payment: let customers pay 100% of the reservation online.
👉 Advantage: lowers the risk of cancellations or no-shows. -
💵 Allow cash payment: option for customers to pay directly at the venue.
-
👥 Allow custom deposits for promoters: let promoters adjust the deposit for each booking.
-
-
Save your changes.
Once created, the rate will be available to assign to one or more zones.
Need help?
👥 Contact us via the PRO chat or write to help@fourvenues.com.