![fourvenues.LOGO.blanco.png]](https://base-conocimientos.fourvenues.com/hs-fs/hubfs/fourvenues.LOGO.blanco.png?height=40&name=fourvenues.LOGO.blanco.png)
Before you begin
🎯 Online Passes allow you to:
✔️ Generate upfront revenue: You collect the full payment at the moment of purchase, even if several of the events included in the pass haven’t taken place yet.
✔️ Offer more flexible products: A single pass can grant access to multiple events—perfect for multi-night packs, season passes, or VIP access.
✔️ Centralize sales at the organization level: You configure a pass once, and it can be used in any compatible event without having to recreate it each time.
✔️ Improve the customer experience: One QR valid across several events = less friction and more repeat attendance.
✔️ Control access through Fourvenues Access: Validation works exactly like regular tickets: QR scan, verification, and entry.
(Passes validation is currently only supported on Android devices)
ℹ️ Who can do this:
-
Organization administrators can configure passes.
-
Professional users can sell passes as long as this is enabled in the pass settings.
Step by step
1. Go to the Online Passes section
Navigate to PRO > Settings > Online Passes.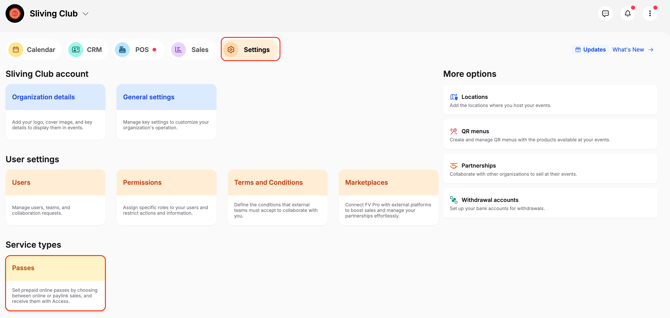
2. Create a new pass and define the basic information
-
Pass name
-
Description
-
Price (Online Passes always require upfront payment)
-
You may also specify what the pass includes and any additional information relevant to customers.
3. Sales settings
Choose where the pass will be available:
-
Online sales (microsite and iframes)
-
Paylinks, allowing professional users to generate activation links and send them to customers to complete the purchase
-
Promoter links (if you enable promoter sales)
Define the start and end date for pass sales.
Assign the events where the pass will be valid.
4. Configure customer data collection
Specify which data fields customers must complete when purchasing their passes. You can also mark which fields are mandatory.
5. Save and activate
Done! Once activated, the pass can be sold through the channels you enabled.
If online sales are enabled:
🧠 Remember! Passes are purchased through the main page of your microsite or iframe.
If paylink sales are enabled in PRO:
Go to Sales > Passes.
If you enable Promoter sales:
-
The pass will appear in the promoter link (if online sales are active).
-
Promoters may also send Paylinks from PRO (if allowed).
-
All sales will be recorded under each promoter as usual.
Need help?
👥 Contact us via the PRO chat or write to help@fourvenues.com.